It’s time to level up your parenting skills.
Let’s childproof an RV.
(Also known as babyproofing or toddler-proofing, depending on the age of your adorable assailant).
Here are 20+ ideas for how to childproof and babyproof your RV!
Outlet Covers
This one’s a no-finger no-brainer. RV outlets can be anywhere, any height, any room. And not all outlets in an RV are GFI-protected!
Plus, very few RVs have tamper-resistant outlets, so kids can stick knives, pencils, or inquisitive fingers into the contact slots.
The fix is simple. Buy some cheap plastic outlet covers.
If you don’t like the inconvenience of removable covers, you can spend a little more for self-closing, sliding outlet covers.
Rope Off the Ladder
You don’t want curious kids on the roof. Block off the ladder by strapping a plank across the steps or roping off the rails.
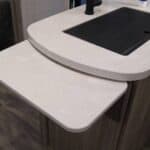
Protect the Corners
Again, this is childproofing 101. RV furniture is full of hard, sharp corners. Use self-adhesive flexible silicone corner edge protectors.
Lock That Stove!
You don’t want your child accidentally igniting the stove and burning their delicate skin.

- If you have a slide-in or integrated stovetop, protect the ignition knob by installing a knob cover.
- If you have a drop-in cooktop, the ignition switch may be protected by the drop-down lid.
- Otherwise, install a self-adhesive polycarbonate stove guard to keep curious hands away from the burners (similar to a squirrel guard).
Lock That Oven!
This one needs no explanation.
Get a Baby Gate
Again, parenting 101 here. A pressure-mounted baby gate between 20 and 36 inches in width will suffice in most RV hallways and entryways.
Screen the Windows
If your kid’s bunk bed has an adjacent window, make sure the window is properly screened or barricaded to prevent your kid from climbing outside!
Put Up the Pet Bowls
Pet bowls are … gross. And kids love gross. If you don’t want little Henry or Megan sharing a dinner with the dog, use collapsible pet bowls that you can put up when the pets aren’t hungry.
Lock That Toilet!
The things kids will do, you know?

If you don’t want to wake up to Mr. Teddy swimming in the toilet bowl, get a Lid-Lok toilet seat safety latch.
Take an Outside Tour
Walk your little ones around the outside of the RV. Point to everything they can’t touch (which is basically the entire RV). Make the roadside of the RV (especially the hookup center) a No-Play zone.

“Keep your hands off the sewer pipe, the power cord, the tires, the batteries, the furnace vent, the fridge vents, the water heater vents, the outlet, the water inlet – on second thought, just don’t touch anything.”
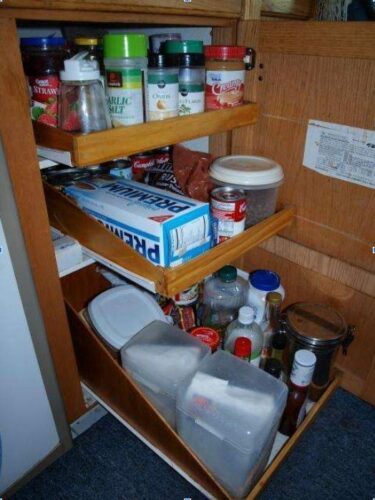
Latch the Cabinets
If your RV doesn’t already come equipped with strong cabinet latches, you need to get some!
There are quite a few options.

- 10-lb pull-to-release grabber latches will hold most cabinet doors and drawers shut.
- Cam latches are a common choice for heavy bottom drawers.
- Push-button latches are a more modern (albeit more expensive) alternative to cam locks.
- Barrel-bolt latches work great, but are a bit of an eye-sore.
- And, of course, there are always classic spring-loaded child-safety latches.
Barricade the Beds
Many RVs have bunk beds, convertible dinettes, or sleeper sofas, but very few have means of protecting your child from rolling off.

Thankfully, the aftermarket has your back. You can purchase an adjustable bed rail that slips underneath your child’s mattress. These bedrails are partially transparent, so you can still check in on the darlings!
Alternative: You can also use stretchy cargo netting rather than bedrails.
Invest in Collapsible Gear
Space is at a premium, my friend. You can’t afford fixed gear. Choose these items instead:
- Pack n’ play for a crib
- Umbrella stroller rather than jogger stroller
- Traveling high chair
- Baby travel cot
Love the Shag
Lay down a couple small shag carpets (or non-shag, if that’s your style) below beds and in high-traffic areas. Gotta protect those heads from hard falls!
Install a Wireless Door Alarm
Keep your little Huck Finn explorer inside the camper by installing a motion-sensing door alarm that beeps whenever the door is opened.
Bonus: Latch the screen door with a hook-and-eye or sliding gate latch at least 60” above the floor.
Stow the Chemicals
Don’t leave harsh cleaning chemicals in unsecured cabinets. Better let, lock up harsh chemicals like cleaning agents in a padlocked compartment, and keep the key somewhere safe!
Screw Down the Furniture
RVs don’t typically have freestanding furniture. But if yours does, screw it down! You don’t want your kids tipping it over.

Secure Loose Items with Museum Putty
Museum mounting putty is an RVer’s third hand. You can use museum putty to secure loose items to countertops. It won’t resist a determined 4-year-old, but it will withstand the occasional bump or elbow.
An alternative to museum putty is peel n’ stick Velcro buttons!
Plug In a Nightlight
Don’t trip over Spiderman or step on a Lego in the middle of the night. Install a motion-sensitive nightlight close to the bathroom so nobody gets hurt.
Bonus idea: Line the hallways with glow-in-the-dark tape!
Black Out Shades
Kids don’t sleep well with the sun in their faces (I don’t either, for that matter). Invest in some blackout shades or window cling film.
P.S. Don’t Forget the Booster Seats!
In most states, the rules for children riding in RVs are the same as riding in cars. They must be secured in car seats or booster seats and protected by seat belts, which must meet FMVSS standards.
Andy Herrick is a blogging nerd, #8 Enneagram, wannabe bread baker, INTJ, RV industry professional, and small business entrepreneur. He can be found hanging out with his lovely wife and family, skiing, cycling, climbing, hiking, and convincing anyone who will listen why dogs aren’t really that great of pets. Also, he runs this website.
-
Andyhttps://changingears.com/author/andrew-herrick/
-
Andyhttps://changingears.com/author/andrew-herrick/
-
Andyhttps://changingears.com/author/andrew-herrick/
-
Andyhttps://changingears.com/author/andrew-herrick/


