Ever drive by a hapless RV owner stuck on the side of the highway, feet sticking out from underneath the axle? Feel bad for the poor guy, don’t you?
If you don’t want that to be you one day, keep a close eye on RV maintenance! As the old saying goes, “The only thing that works on an RV is the owner.” Preventative maintenance is part and parcel of RV ownership – and a penny spent on maintenance is a dollar saved on repairs!
If you’re new to the RVing world (welcome, first of all), you might be overwhelmed by all the maintenance chores. We’ve compiled this checklist of common motorhome maintenance tips for beginners so you can keep Ol’ Bertha in tip-top shape! You’ll have peace of mind when you roll up to your next beach resort or national park.
1. INSPECT BATTERY WIRING AND TERMINAL CONNECTIONS

Check to make sure all the wiring connecting to your batteries looks good and doesn’t have any signs of corrosion or flaying at its connections. The wire insulation should be flexible and solid-colored, not faded or cracked.
Remember to check both your house and your starting batteries! (If they’re flooded lead-acid batteries, check the electrolyte levels while you’re at it).
If you have rooftop solar, double-check those connectors (usually MC4, PV4-S, or ATP) as well.
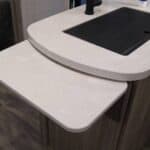
2. SEAL SHOWER & SINK LEAKS
Showers often leak around the base at the intersection with the shower surround.
Sinks often leak around the sink perimeter.
These leaks are slow but deadly. A leaking shower can soak the OSB shower base or subfloor, causing it to disintegrate within a few years. And a leaking sink can ruin countertops made with a particle board, EPS foam, or MDF core. Replace your shower and sink sealant every 2-3 years for best performance.
3. CLEAN OFF YOUR SOLAR PANELS

If you have rooftop solar panels, check that the PV wire and MC4/ATP connectors on your RV roof are securely fastened down.
Are your solar panels clean? Give them a wipe down every other week to make sure you’re generating energy. Dusty solar panels will wear out faster and produce less electricity.
4. PACK SOME SPARE FUSES
RVs have circuit breakers and fuse boxes like our homes, so make sure you’re bringing spares! Common power distribution boxes use ATC fuses in 15A, 20A, and 30A sizes (with 40A common for battery reverse polarity).
And while you’re replacing fuses in your converter, clean off the converter vent so the cooling fan can do its job.
5. KEEP CAULK, SPRAY FOAM, AND ROOF REPAIR TAPE ON HAND

Tubes of caulk and rolls of roof repair tape are an RV owner’s best friends. Never depart for an adventure without a trusty tube of Geocel Proflex RV and a trusty roll of EternaBond Roofseal repair tape. With these two sidekicks, you can temporarily patch ripped membrane roofing or cover cracked self-leveling sealant, or waterproof an accidental hole in your subfloor.
Bonus: Bring along some expanding spray foam, too. Then you can waterproof any holes in your subfloor – critical for keeping rodents and insects at bay!
6. PAINT YOUR CHASSIS FRAME

If your adventures ferry you to the Eastern U.S. or ocean shores, the humidity or salty air will quickly corrode any exposed steel. Prevent structural damage to your chassis by spot-painting any paint cracks or chips with aerosol high-performance enamel.
Pay particular attention to welded joints (such as axle hanger joints), as welds tend to rust most quickly.
7. WASH AND COAT THE ROOF OF YOUR RV

You need to regularly wash the roof of your RV! Especially if you pack anything on top, such as surfboards, kayaks, skis or snowboards. Or if you store your motorhome outside. The waxes, salts, bacteria, and other chemicals are not good for your roof!
- Bird poop (from parking outdoors)
- UV degradation
- Saltwater from surfboards
- Dirty water from snowboards and kayaks
If you wash the roof of your RV, you may not need a replacement for 15-20 years – maybe even more if you store it beneath a roof. But if your RV roof is getting old, why not recoat it? RV Armor is our recommendation for a permanent lifetime RV coating.
8. ALIGN YOUR SUSPENSION REGULARLY
Look out for potholes on those John Denver roads. Most RVs travel close to their GVWR, so the added weight can take a terrible toll on the suspension if you hit a bump or ditch.
If your steering wheel is shaking or pulsating while you drive, take it to a mechanic to have them take a look at the tie rod ends, ball joints, wheel bearings and CV axles.
If you veer off-course, take your motorhome to a shop for an alignment. A properly aligned suspension extends the lifetime of your tires and wheel bearings.
9. LUBRICATE WHATEVER MOVES
Anything that spins or swivels must be well-oiled, inside and outside! Furniture hinges, entry doors and cargo doors, windows and roof vents, etc. You might have a drop-down bed like the old Hymers or a fold-out bed in the new Mercedes Sprinters. Doesn’t matter; anything that moves gets the grease, such as:
- Sliding door tracks
- Fold-out, drop-down, or Murphy beds
- Locks and key holes
- Roof window hatches
- Refrigerator hinges
While you might be tempted to grab a can of WD-40, there are better options. For rubber and plastic parts, nothing beats silicone spray. For metal-on-metal contact, choose white lithium grease.
10. RUN THE GENERATOR UNDER LOAD
Generators don’t like to sit idly for months of the year. Try to run the generator (under load if possible) at least one hour straight, once a month. Use fuel stabilizer if leaving gasoline in the tank for extended periods. And change the generator oil religiously!
11. KEEP THOSE PIPES CLEAN!

It’s a surprise that with all we put down the drains, from food to dust to hair, that the water keeps draining at all! Before you even get going on your journey, get a small filter to put over the shower and sink drains.
If you do have a clogged drain, you can usually unscrew the slip joint around the Hepvo waterless trap valve or P-joint. Nine times out of 10, that’s where the clog is.
Speaking of traps, be sure there’s plenty of water in your drain traps before putting an RV into storage! If the water evaporates, sewer gases can escape into your RV. Gross.
12. UNCLOG TANK DRAIN VALVES

Over time, floating debris can get in your gray and black water tanks. This can cause a blockage and won’t allow the tanks to drain correctly.
So next time you go to drain your tank, use the parking stabilizers or leveling blocks. Tilt your Rv towards the drain (usually the road side) so that the gravity is pulling down on the drain where the water comes out. You can then use a simple stick or thin wire to jiggle any block loose and allow for a full drainage of your gray water tank.
13. SANITIZE THE FRESHWATER TANK
I add a tablespoon of bleach into my 38 gallon freshwater tank every so often. This helps to reduce algae and bacteria growth and won’t cause any damage to your water tank. This is crucial in spring and summer when temperatures start to rise.
No, a little bit of bleach won’t hurt you! Almost all municipal water supplies are bleached, after all. The rule of thumb is if you can smell the bleach after 20 minutes, you added too much. A little goes a long way!
14. EMPTY THE WATER PUMP STRAINER
Most RVs have a self-cleaning water pump, but it’s not foolproof. The filter/strainer on the water pump may become congested with hair, pipe shavings or other impurities. Usually, you can unscrew the inline strainer from the water pump, flush it out, and reinstall it. This isn’t only good to keep the water flowing strong, but it will use less energy to pump water.
15. LOOK UNDER YOUR BED

Every so often, check under your bed and cushions. Moisture turns to collect under your bed, which can cause mold and mildew problems. Try flipping your mattress every six months, or if that’s not an option, use an breathable mattress base like the Hypervent Aire-Flow system.
While you’re dismantling your bed, check the cabinet below for any water piping. If there is a leak, it will cause mold or other growth that will damage your RV. You can also check out the wiring while you’ve got everything dismantled.
16. BARRICADE CABINET DRAWERS

When I was traversing a bumpy road, my RV would shake like a maraca. The weight of items in the cabinet drawers proved too much for the old latches, causing plates and glasses to come flying out. Be sure to fix any latches immediately!
- You can replace worn-out roller catches with 10-lb marine grabber latches for a more secure fit.
- Another popular DIY trick is to use adhesive childproof locks. No need for screws or tools!
- If that still doesn’t do the trick, try using cam locks, which will defeat even the most stubborn drawer.
17. AIR UP THOSE TIRES!

An underinflated tire is a weak tire. And with motorhome RVs so often loaded at (or even over) their weight limit, an underinflated tire is just asking for a blow out!
- Air up your tires to the maximum pressure stated on the sidewall.
- Inspect the sidewalls and tread for any cracks or bulges.
- Re-check if you ascend more than 5,000 feet in elevation.
- Check them before every road trip and every morning while traveling.
- And don’t limp away five miles to a gas station to fill them up – use a 12V inflator! Even traveling a short distance on severely underinflated tires can permanently damage them.
18. MAINTAIN YOUR BATTERIES
If you have flooded/wet lead-acid batteries, you should check the electrolyte level every 90 days. If water has boiled off, replace with distilled water (not spring water, not purified water!) And don’t let batteries sit idly on a shelf during the entire off-season; keep them on a trickle charger.
What travelers are the happiest? The nomads. Keep calm and make sure to do regular checks on your RV. In my experience, fellow travelers are more than keen to help. All you need to do is ask.
19. BATTEN DOWN THE HATCHES!

RVs travel at 60-70 MPH. This is a lot of wind resistance. Take a peek at the safety latches on the awning, the collapsible entry step, the antennae, A/C shroud and other exterior components. And ensure the outside storage holds are locking tightly. You don’t want them opening while driving! Storage door holds are usually cam locks, which can be adjusted with a spanner wrench.
20. INSPECT YOUR WINDSHIELD

If you thought replacing a windshield on your sedan was expensive, you haven’t seen anything yet! The average cost of a Class A windshield replacement is $2,000 – $5,000, with the glass itself usually costing over $1,000!
You can often repair a small crack or divot before it turns into an irreparable crack. These epoxy repair kits cost $10-$20. If the damage is more extensive, let the professionals do it.
21. REPLACE YOUR FLUIDS!
Maintaining and topping off your fluids is the cheapest, most effective motorhome maintenance!
- Engine oil
- Transmission fluid
- Differential fluid
- Brake fluid
- Power steering fluid
- Engine coolant
- DEF (diesel)
Check your Owner’s Manual for fluid change intervals (under normal and heavy-duty conditions) and recommended grades. Remember, there’s no penalty for changing fluids early! The weight of a motorhome really taxes the powertrain, so show the transmission and motor some love.

Bilingual Spanish and English writer. I lived in a RV for a year while traveling through Germany, Switzerland, Italy, France, Andorra, Spain, Portugal.