We have a hard enough time trying to avoid Legos, children and our dog as we walk through our trailer. An unleveled trailer only makes this obstacle course more treacherous. If you aren’t lucky enough to have an automatic leveling system, you’ll need to learn how to level your trailer side to side and front to back.
WHY DO I NEED TO LEVEL MY TRAVEL TRAILER?
Did you know that if your trailer isn’t level, it could lead to a fire? That’s just one of 3 important reasons for having a level trailer.
Stability –
Being level improves stability of your travel trailer. We have four kids, one dog and two adults in our trailer. So yes, our trailer is normally “a rocking” but not for the reasons I’d like it to be. I’ve found the rocking and movement in our trailer is greatly reduced when our trailer is level.
Comfort –
It’s frustrating when the trailer isn’t level. The times, I didn’t get everything completely level, our Brita water filter system reminded me the entire stay. Doors don’t shut or don’t stay open, that morning walk to the bathroom is made more challenging and our fridge may not operate at an optimal level.
Speaking of Refrigerators …
Many RVs come with an absorption refrigerator. Let’s just say there is a lot going on behind the scenes to keep your food cold and fresh. Truck Camper Adventure provides a detailed article on how these refrigerators work and how an unleveled refrigerator can negatively impact performance. In extreme situations, the fridge can even catch fire!
WHAT DO YOU NEED TO LEVEL YOUR TRAVEL TRAILER?
Leveling your trailer side to side requires driving your tires over some type of block to lift one side of the trailer. I used to use mismatched boards but soon found these weren’t going to cut it. Driving over blocks and rearranging them can be a bit of a guessing game but it gets easier with experience. Leveling front to back requires you to raise or lower the trailer’s tongue jack. You’ll also need some sort of level because eyeballing it just won’t do.
Supplies I Use to Level Our Travel Trailer
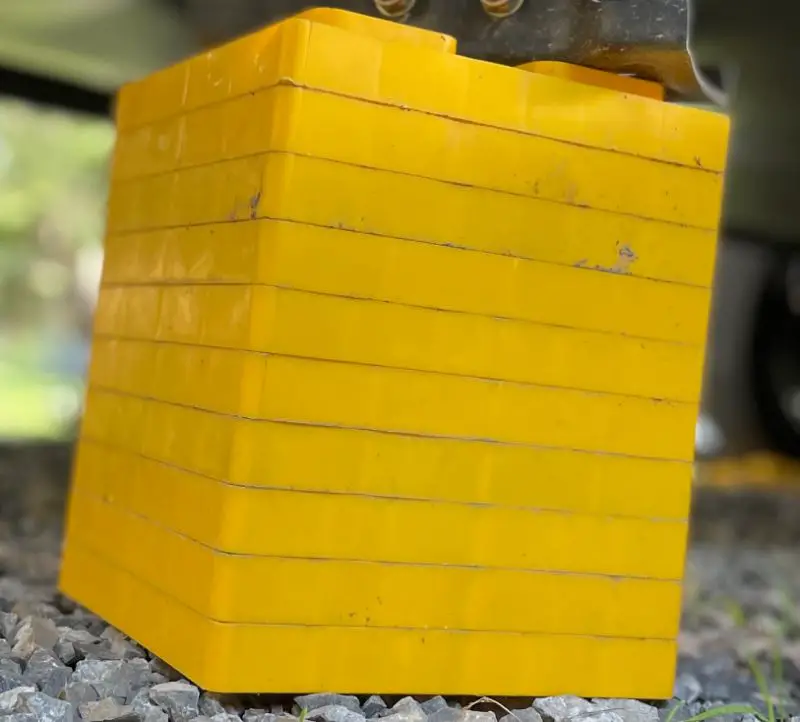

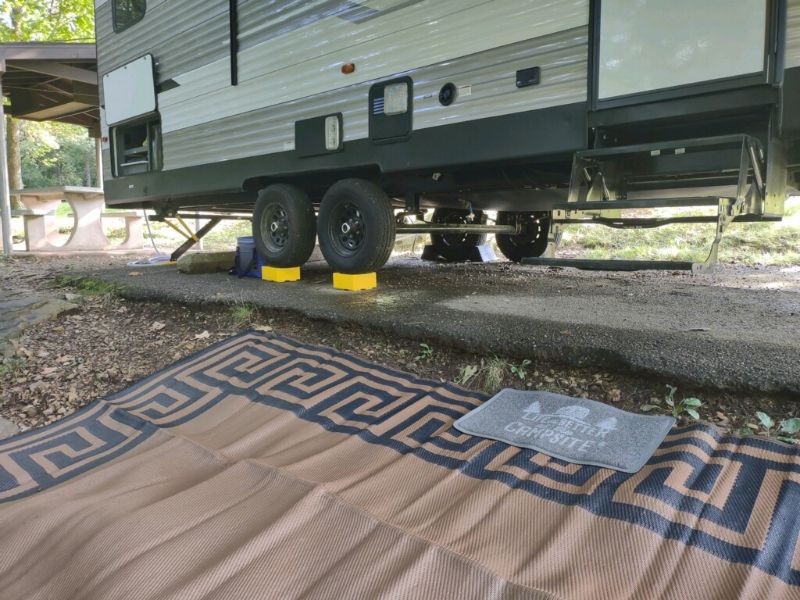
- 4 – 10 packs of Camco Leveling Blocks. All 40 aren’t used for leveling. Whatever is leftover, goes under the stabilizing jacks. I use anywhere from 4 to 20 to level the trailer side to side and a couple more under the tongue jack to level front to back.
- 1 Box level – used mostly to verify the trailer is level on the outside.
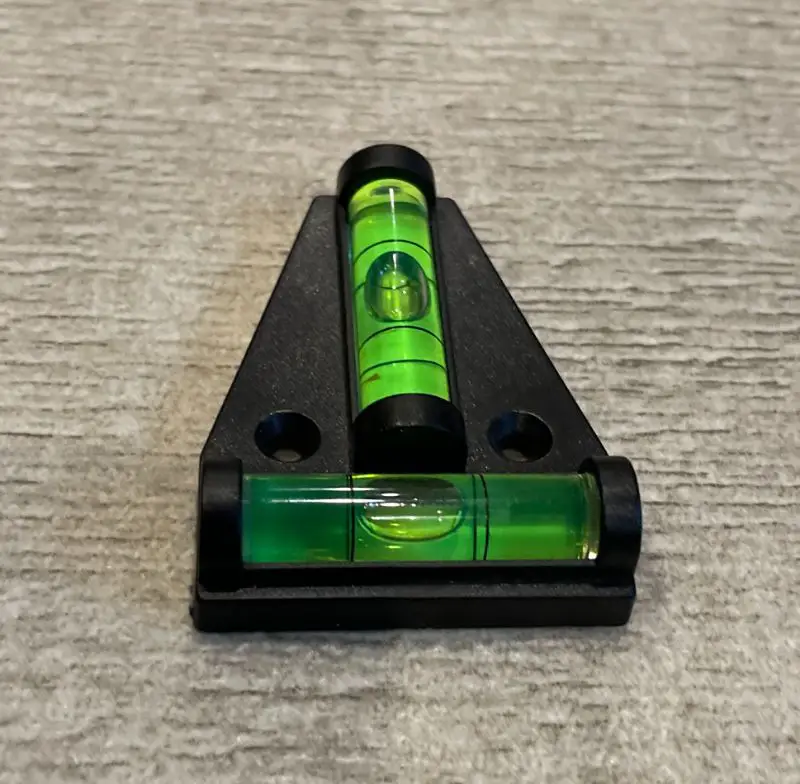
- 1 Camco T level – final check inside the trailer to verify we are level side to side and front to back.
You don’t need to spend a ton of money on fancy leveling gadgets and supplies. There are free apps such as Bubble Level and repurpose wood you have laying around for leveling blocks. Just be prepared prior to arriving at your campsite. Know the terrain, research reviews and have a plan.
My buddy Brandon had to get creative on a recent trip that found him short on leveling blocks and his ramps weren’t enough to do the trick. His solution: combine the two!
PROCESS WE FOLLOW FOR LEVELING OUR TRAILER
GOAL –
I Get Out And Look at the site prior to parking as part of my backing up process. I take into account how much leveling will be needed. Thankfully, leveling side to side hasn’t been a major issue during our adventures.
Park Your Trailer but Don’t Unhitch –
Once you have your trailer parked take into account that you will still need to driver over your leveling blocks.
How Bad Is It? –
I place my trusty box level on the A-Frame portion of my trailer. The farther the bubble is from the center line, the more leveling blocks will be needed. If the bubble reads to one side then I know I need to put leveling blocks under the opposite side tires. You can also lift one side of the level to get the bubble in the middle. This helps you visualize which side needs to come up. This illustration assumes red needs to go up on leveling blocks, green is good and you are facing the front of the trailer
- Set up the Leveling Blocks – I make a ramp with our leveling blocks for anything more than one block.
- Drive Over the Leveling Blocks – You can either back up or pull forward over your blocks. Use a spotter to tell you when to go and stop. Make sure you can see your spotter in your mirror when driving over the leveling blocks.
- Where’s the Bubble? – It’s time to see if we got it right. I place my level on the A-frame portion of the trailer. If we still have a ways to go I don’t check anywhere else yet. If you got it right skip to number 11.
- Drive off the Leveling Blocks – There’s no shame in having to do this more than once. There are other leveling options that take some of the guesswork out of leveling that I’ll discuss later.
- Rebuild the Leveling Blocks – Adding or removing based on where your level is reading.
- Drive Back Over the Leveling Blocks – Deja vu’ all over again
- Check it Out – At this point, I’m feeling confident we are pretty close. I use my trusty level to verify on the A-frame. If that looks good I check the bumper and then inside the trailer.
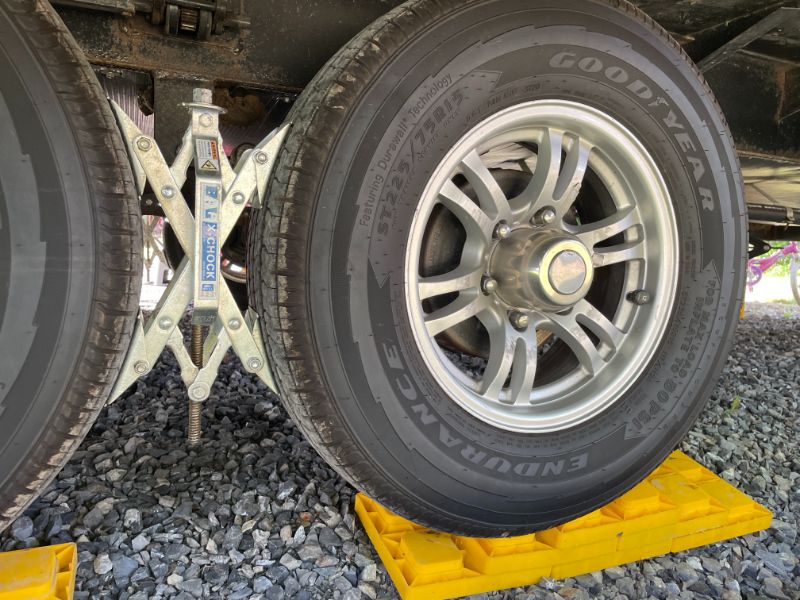
Secure the Trailer – I use X-Chocks between both sets of tires and a set of wheel chocks for the tires I didn’t raise. - Level the Trailer Front to Back – After I disconnect the tow vehicle, the rest is pretty easy. The hardest part of this step is getting someone to answer me when I ask if the trailer is level yet. We have an electric tongue jack so leveling front to back just requires lowering or raising the jack. I verify we are level front to back and side to side using a small T-Level. It’s at this point I decide if we are good enough to move forward with the rest of our set up process.
MAKING LEVELING EASIER
When I first started camping I had a bunch of mismatched boards and one 10 pack of Camco leveling blocks. It didn’t take but a few camping trips to realize this wasn’t going to work. I ended up getting 3 more 10 packs of Camco leveling blocks.
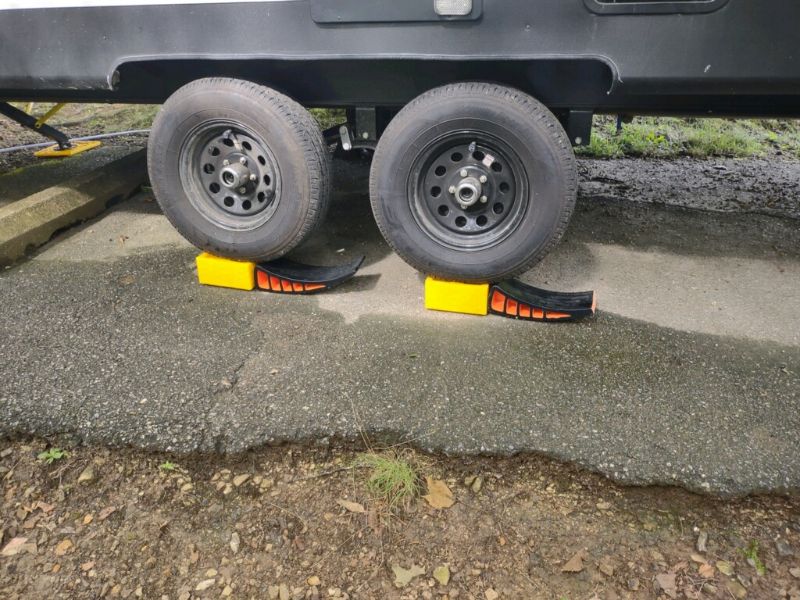
- Anderson Camper Levelers – The Anderson Camper Levelers eliminate the need of adding and removing leveling blocks. You simply driver your trailer over the leveling ramps and stop once the trailer is level side to side. A secondary person is needed to alert the driver when to stop. Another benefit of the Anderson Camper Levelers is the wheel chock. The wheel chocks provide further assurance that the camper will stay in place. Camco and Haul Master both offer a similar product.
- Level Up – If you don’t feel a box level like mine will do the trick there are many other options to assist in getting your trailer level.
- RV EZ Level – This device placed on the floor of your RV and uses green and red lights to signify which points aren’t level.
- Level Mate Pro – If you really want to step up your game this is the product for you. You mount the base unit in your trailer and use the app to see how level your vehicle is. Pairing the Level Mate Pro with the Anderson Camper Levelers makes leveling a one-step process.
The best advice I’ve gotten and continue to share is take your time. Don’t be in a rush when you’re driving, backing up or leveling your RV. That leads to mistakes and that can ruin what would otherwise be an amazing time. Don’t be afraid to take a couple tries to get it right. If you still need some help, spend a little money on some upgrades. Getting your trailer level gets easier the more you do it.

Full-time RVer, husband, father, son, brother, friend and dreamer. I am officially “living the dream:” traveling the country with my amazing wife, four awesome kids, and beloved boxer in our 150-sf RV. Each day we are learning, laughing, (maybe a little yelling) and finding the good in this world.