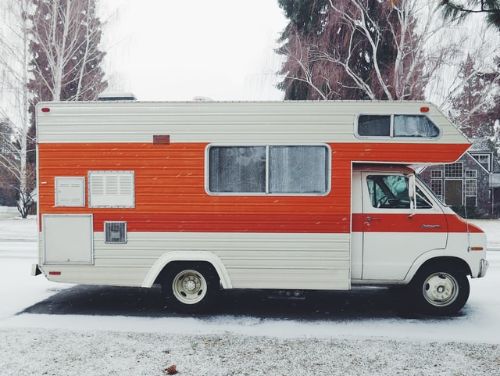
RVs are not made for cold weather camping. If you don’t believe us, try it! See you in about six hours.
Whereas most American homes have wall R-values of at least R19, you’ll be lucky if your RV sidewalls have an R-value greater than R5.
The truth is that camping in subfreezing temperatures in your RV may require some sacrifices and extra work. But it can be done! Tens of thousands of campers live and work in their RVs year-round.
Some RVs, especially those from Pacific Northwest manufacturers, are built for 4-season use. They include features like:
- Double-pane glass or acrylic windows
- Enclosed, insulated/heated tanks
- Water inlets and outlets inside the heated interior envelope
- Thick walls, thick roof, composite floor
- Cold-weather protection for absorption refrigerator
- 25k+ BTU propane furnace or catalytic heaters
But virtually all RVs, 4-season or not, will require some modifications for frigid temperatures.
Table of Contents

To Winterize or Not to Winterize?
When it comes to water, you have two basic options:
- Heat or insulate your pipes and tanks and risk it! YOLO!
- Winterize your system and bring all water in portable jugs.
Most campers choose option 2. It’s safer. No one – repeat: no one – wants a leaky pipe, especially in the winter.
You can bring along water in 1-gallon plastic jugs or 5-gallon collapsible containers. That’s all you need for drinking and washing dishes.
If you’ve winterized your gravity toilet, then you can’t use it. Otherwise, you can just pour some water from a jug into the toilet bowl and do your business as usual.*
*If you have a more complicated plumbing system involving a macerator or vacuum pump, then all bets are off, and you’re better off winterizing the system and leaving it alone.
For showers, visit a campground or truck stop. Or just wash your hair. No one sweats in the winter anyway, right?
If you can’t (or won’t) use your toilet, then consider a portable toilet option. The cheap choice is a simple Camco portable toilet, but you have two other off-grid options:
- The Laveo dry-flush toilet (automatically bags it up for you!)
- Composting toilet (Sun-Mar, Nature’s Head)
How to Winterize Your RV System
We won’t spend too much time on this topic. There are thousands of online guides on how to winterize your RV. Explore Google or YouTube for a step-by-step series of instructions on how to winterize your unit.
You should also refer to your Owner’s Manual as well, as some parts have restrictions (e.g., you may need to remove your anode rod to thoroughly drain your water heater).
BRIEF: How to Winterize Your RV (Classic Antifreeze Version)
- Disconnect from city water supply and sewer drains.
- Drain and flush the gray and waste water tanks.
- Drain and flush the water heater, if storage-type.
- Bypass the water heater (through water management access panel or inline ball valves).
- Drain your hot and cold water lines through the petcocks on the low-point drains. Flush the toilet a few times, too.
- Use your water pump to pump pink RV antifreeze through the system. Open the faucets and valves and run water until the liquid comes out pink.
- Pour some extra antifreeze down your P traps (sink, shower drain) and toilets.
- You’re done!
Using RV antifreeze (not automotive antifreeze!) is the classic solution as described above.
An alternative is to use compressed air. This method blows out all the water, leaving only clean, empty lines.
Using compressed air has some tips and tricks, though. You’ll need to drain your water pump and remove any inline water filters. Plus, you’ll need to individually blow out your water heater before moving on to the rest of the system.
For a more detailed description of wintering your RV with an air compressor, we recommend this article from The RV Geeks.
RV Winter Camping 101
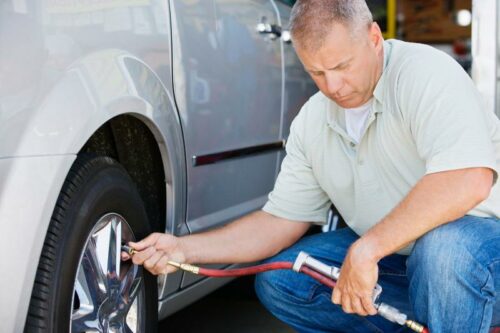
Prevent Your Water Hose From Freezing
If you’re connected to city water with a fresh water supply hose, there’s a risk the water inside can freeze and burst the hose!
One option is to put on your boots, coat and gloves to connect, disconnect, and purge the water hose every time you run out of fresh water.
Which sounds awful.
Instead, you can either buy a heated water hose, or you can make your own using heat tape and split foam tubing (or if you’re really cheap, pool noodles).
This hack from The RV Geeks advises wrapping your entire water hose with aluminum foil first to help heat distribution.
Note: We don’t recommend using fiberglass pipe wrap or insulated flexible duct. These products use fiberglass insulation, which loses its R-value when wet.
A bonus hack: In a pinch, let some water dribble from your faucets. Moving water is hard to freeze. However, you can easily lose a few gallons of water a day with this tip.
Prevent Your Sewer Hose From Freezing
Again, the cheap option is to simply reconnect, disconnect, and flush out the sewer hose every time you empty your tanks.
But if you’re living in your RV full-time during the winter, this would be an enormous hassle.
You have three options:
- Keep the sewer valve closed and only drain your tanks once full
- Make your own heated hose (similar to the water hose hack)
- Purchase a heated sewer hose, heated hose supports, or heated hose wrap
And remember to prop your hose up so all water runs downhill! Don’t allow any dips. Anywhere that water can pool will quickly freeze in frigid temperatures.
It is also recommended, although not always followed, that you don’t leave your sewer valve open and hoses connected to a city sewer system. This can cause the dreaded “poopsicle.”
Psst … if you don’t have RV sewer hose ladder supports, you can use a piece of aluminum or vinyl gutter. Tip courtesy of AirSkirts.
Prevent Your Tanks from Freezing
Larger RVs, such as motorhomes and 5th wheels, typically have the water tanks (fresh, gray, and waste) enclosed in the chassis basement. Big travel trailers typically have the water tanks protected by an underbelly.
But just because you can’t see the tanks doesn’t mean they’re protected.
Some tanks are wrapped in electrically heated blankets to prevent freezing. If you have access to your water tanks, you can perform this mod yourself. Just make sure you have enough energy in your batteries!
Other tanks are in enclosed, heated compartments, serviced by ducts from the furnace.
Insulating your tanks is much cheaper than heating them. Wrapping your tanks in insulation blankets can allow you to camp in 10-20 degree colder temperatures.
RV Cold Weather Hacks + Tips and Tricks
1. Draft-Proof Your RV
Insulation gets all the hype, but the truth is that air drafts lose far more heat.
Common sources for air leaks include rattly window panes, floor-to-wall joints, the entry door, ceiling fans, unsealed holes in the floor, and exhaust vents for the furnace, fridge, range hood, etc.
Meet your four new best friends:
- D-bulb weather-stripping: Draft-proof the entry door, hinged windows, ceiling fan lids
- Expanding spray foam: For odd-shaped openings in the underbelly
- Non-sag caulk sealant: For sealing around window flanges, sidewall vents, etc.
- Fine steel wool: For insect- and draft-proofing pass-thru holes in the subfloor
You might also consider installing a vent cover above your vents and wrapping your rooftop air conditioner in an insulated A/C fabric cover.
If you’re really desperate, drape a thick beach towel over the entry door to block drafts.
If you’re deadly serious about stopping air leaks, you can also ask a local RV dealer for a Seal-Tech test to find air leaks in your camper.
2. Warm Up the Floor
Did you know you lose more heat through your hands and feet than anywhere else? That’s because whatever you’re physically touching drains heat faster than just air.
No one likes the feeling of a cold floor. Why not warm it up?
Unfortunately, installing a true floor heating system in an RV is a major renovation.
However, you can insulate the floor by installing block foam underneath the subfloor. If your floor bay is protected by a Coroplast underbelly, you might not have this option. But you can ensure that there’s adequate fluffy insulation from the factory.
Even simpler: Invest in a rug. A rug feels much warmer on bare toes than naked vinyl. And unlike carpet, a rug can be easily removed and cleaned.
Or just wear fuzzy socks and poofy slippers. Your call.
3. Here Comes the Sun!
You need to maximize the natural sunlight entering your RV.
This can be as simple as parking your RV so the sidewall with the most window area faces south. And don’t let trees block the rays!
On sunny days, the amount of heat from sunlight is far greater than the heat lost through window panes. So when the sun comes out, peel back those window covers and let the sun shine!
If you’re up for a major DIY renovation, consider adding a bubble plastic skylight to your RV roof. You’d be amazed how much sunlight and heat can enter through a clear skylight, even in the dead of winter!
4. Cover the Windows
At night and on cloudy days, you should cover and insulate your windows and ceiling fan openings.
Most RV owners opt for Reflectix, bubble wrap sandwiched between two layers of aluminum foil. You can also use plain polyethylene bubble wrap or 1-inch thick styrofoam as well.
None of these materials are cosmetically appealing, so you can improve the looks of your camper by upholstering your DIY window covers in canvas or other fabric.
Wondering how to attach them? If you’re lucky, they’ll squeeze right into place! If not, then the best solution is to use self-adhesive Velcro dots.
Another good solution is heavyweight thermal curtains.
5. Run a Dehumidifier
In a house, winter is usually the time to dust off the humidifier to combat chapped lips and dry skin.
But in an RV, where space is so small and enclosed, just living, cooking and sleeping inside an RV is enough to humidify the air. And that humidity, once temperatures drop at night, can cause excessive condensation on your interior surfaces. And then you start finding mold spots everywhere.
You should run a dehumidifier daily to maintain humidity at 40-75%. Don’t let it climb above 75%, or you’re creating an environment conducive to mildew growth.
6. Protect Your Batteries
Extreme cold can pose a danger to any type of battery, in particular lithium-ion batteries, which cannot be safely used if their ambient temperature falls below freezing. Don’t let that happen!
Lead-acid batteries can also freeze. The lower the state of the charge, the higher a temperature a battery will freeze at. So don’t deeply discharge your house batteries unless they’re in a heated compartment. Just one freeze/thaw battery cycle can ruin it forever!
Oh, and while you’re at it, upgrade your battery bank to at least 200Ah capacity. You’ll be amazed how much longer you can dry camp! Pair them with a solar panel system, and you’ll be able to camp comfortably even in the dead of winter.
7. Keep a Hair Dryer Handy
Look, sometimes, the worst happens. You see a bubble in a pipe. Or your windows have frozen stuck.
Keep a hair dryer handy to fix these occasional problems. Just be aware that most hair dryers run off 120V AC power, so you’ll need an inverter if you’re camping off-grid.
Note we did NOT recommend a propane torch! These are NOT safe and can easily catch your RV on fire. Plus a propane torch can easily damage PEX, PVC, and other pipe materials.
8. Get a Sleeping Bag
At the risk of insulting your intelligence, if you want to boondock during the winter months, you should avoid operating your furnace unless necessary. It is the #1 propane hog in your RV, and the fan will drain your 12V battery.
- Sleeping inside a sleeping bag or duvet
- Wearing fuzzy socks
- Wearing a woolen beanie
- Pulling on some fingerless gloves
- Wrapping a scarf or bandana around your neck
… are all free, easy, cheap ways to instantly feel warmer!
Bonus hack: Get a heated blanket. Nothing feels better.
9. Keep Out the Mice
Mice, rats, squirrels and insects enjoy the heat just as much as you do. Unless you want a lot of unwelcome roommates, you’ll need to prepare your RV for winter camping.
Thankfully, the solutions are simple.
- Thoroughly clean your RV interior! Clean up any food crumbs on countertops, floor, cupboards, etc.
- Seal any holes in the floor with expanding spray foam; seal any roof gaps with self-leveling sealant or EternaBond roof repair tape. Mice can get through a hole as small as 3/8″ in diameter.
- Mice often make their way into RVs by climbing up tires, power cords, and sewer hoses. You can install mouse guards on or around all these items to deter the pests.
10. Don't Get Stuck!
- Place blocks underneath your stabilizer or leveling jacks so the pads don’t freeze to the ground.
- Freeze/thaw cycles can allow your tires to sink into the ground. When possible, park on gravel or concrete surfaces.
11. Bring Extra Propane
If you’re accustomed to summer camping, you’ll be astounded how quickly you’ll consume propane in the winter. A family can go through a full 30-lb tank of propane in less than a week!
You either need dual propane tanks with an automatic changeover regulator, or you need a reliable way to measure your propane levels (and no, pouring hot water on the tank doesn’t count).
A propane gauge is a cheap investment and will give fairly accurate results. For the best accuracy, invest in a propane weight scale, which sits underneath your portable DOT propane tanks.
Psst … if it gets seriously cold, you might need to warm up your propane bottles, too! The propane won’t freeze (unless you’re camping in the Arctic), but it’ll slowly lose the ability to vaporize as the temperature drops.
12. Use a Space Heater
If you don’t need to heat your entire RV, why waste the propane?
Two trusted options for small space heaters for your RV include:
- A portable catalytic propane heater
- Portable ceramic space heater
Propane Catalytic Heater
A catalytic propane heater burns propane very efficiently, consuming extremely little oxygen. Many are rated for indoor use and are powered with a 1-lb propane canister.
A popular brand is Mr. Heater, which makes models as small as 3,000 BTU. Another well-known product is the Camco Olympian Wave heater series, which are designed to be mounted on a wall.
Catalytic propane heaters are radiant heaters. Sitting in front of one feels like enjoying a small fire.
Electric Space Heater
A small electric space heater, usually made from a ceramic heating element and a fan, is a great way to quickly and safely warm up a small area, like a bedroom or bathroom.
12V ceramic heaters are commonly used by truckers. You can find one for as little as $20. They work like a charm, but beware! – they’ll drain your battery very quickly. You might need an upgraded battery bank in order to use one for more than an evening or two.
If you’re connected to shore power and don’t have to worry about energy conservation, you have two other options:
- If your A/C is a heat pump, you can use it as a heater. However, most air conditioner heat pumps don’t work well below 32-45 degrees Fahrenheit.
- If your A/C has a heat strip, you can use it as a heater. Never try this while boondocking, however! You’ll kill your battery in a few hours or less.
13. Maintain Your Slide-Outs
Don’t let snow accumulate on top of slide-outs. Slide-outs can leak in the best of circumstances; don’t tempt the fates.
In fact, don’t extend your slide-outs unless you have to. They’re typically poorly insulated and drafty. And any flexible plumbing hoses inside the slide-out are more prone to freezing.
14. Maintain Your Slide-Outs
Skirting is the secret sauce to staying warm in winter inside your RV.
It is time-consuming to set up and teardown. But when done properly, skirting insulates and encloses the bottom of your RV. Think of it as a heated basement.
RV Inspiration has an article showing all the RV skirting options for every budget. If you move around a lot, you might want to consider inflatable or folding skirting. If you stay in one place, you can use vinyl skirting, foam board, or plywood!
Don’t use straw bales. They are a major fire hazard.
15. Enjoy a Home-Cooked Meal
Guess what makes heat and delicious food at the same time? Your stove! So go ahead, add some cinnamon and marshmallows to your hot chocolate brew. Enjoy broccoli and cheese soup. Baby, it’s cold outside, and you’re toasty and warm inside.
It (almost) goes without saying that a stove should never be used for space heating! A stove consumes oxygen and should not be left running for long periods of time, nor ever left unattended.

Andy Herrick is a blogging nerd, #8 Enneagram, wannabe bread baker, INTJ, RV industry professional, and small business entrepreneur. He can be found hanging out with his lovely wife and family, skiing, cycling, climbing, hiking, and convincing anyone who will listen why dogs aren’t really that great of pets. Also, he runs this website.
-
Andyhttps://changingears.com/author/andrew-herrick/
-
Andyhttps://changingears.com/author/andrew-herrick/
-
Andyhttps://changingears.com/author/andrew-herrick/
-
Andyhttps://changingears.com/author/andrew-herrick/