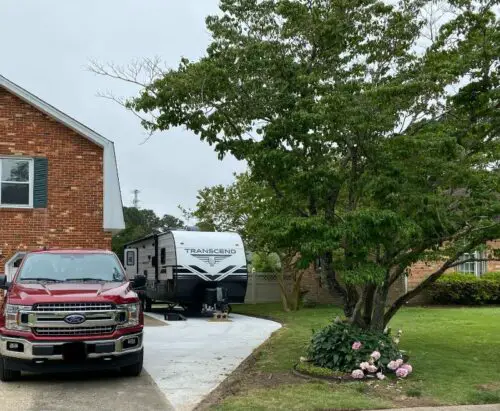
So you want to install RV hookups at home, do you? Well, it makes sense! There are many benefits to full-time RV hookups on your property.
- Offer your RV as a hospitable guest house
- Allow your college kid some personal space to mature
- Rent out your RV on AirBnB, HipCamp, etc.
- Build out a quiet home office
- Live in an RV while you build a house
- Put some space between you and the mother-in-law
- Harbor fugitives of the law in exchange for laundered cash
This post is an overview of how to install RV hookups at home. You’ll get a sense of cost, scope and time. If you plan to do all the work yourself, you’ll probably need some additional information, such as a step-by-step guide to working with UF-B cable or CPVC pipe.
What Are Included in RV Hookups?
Full hookups include:
- Sewer drain
- 30A/50A electric power
- Potable, pressurized freshwater
These are the same hookups you would find at any developed RV campground. For more information on RV hookups explained, visit this post.
You can also install just partial hookups: usually water+electric. In this case, you would dump waste into a portable blue boy, use a composting toilet or porta-potty, or drive to a dump station.
Many homeowners also choose to include other features as part of their RV hookups on their property:
- Concrete or gravel parking pad
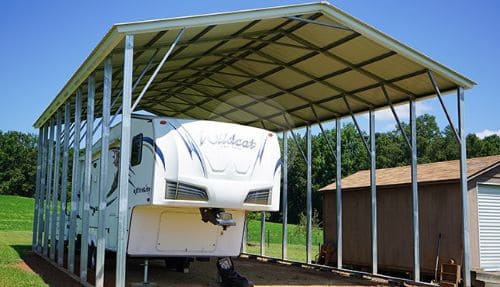
- RV carport or lean-to
- Picnic tables/outdoor living spaces
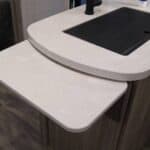
A parking pad is an extremely popular addition to RV hookups. After a season of frost heave and mud cycles, your RV tires can sink six inches deep into virgin ground! A tamped gravel parking space or poured concrete pad keeps your tires out of the ground, prevents plants from growing around your RV, and gives you a clean working space underneath the rig.
How Much Does It Cost to Install RV Hookups On My Property?
- If you do all the work yourself, with a little luck on your side, you can set up full RV hookups for about $500.
- If you pay a professional to install water, sewer, and electric hookups, you could be shelling out $5,000!
Electric, water, and sewer hookups don’t require more than a few hundred dollars in materials. Most of the cost is in machinery and operation. A shovel is cheap, but you’ll almost certainly need to at least rent a trencher.
One of the biggest cost factors is the distance from your house to your RV pad. Pipe and wire are priced by the foot – and every foot takes longer to trench and backfill. Remote or awkward locations can easily double the cost of RV hookup installation.
Of the three required hookups – water, electric, and sewer – sewer is the big gamble. Setting up a sewer hookup could be virtually free if you have an accessible clean-out (that’s legal to use). On the other hand, if you need to install an RV-specific septic system or reserve tank, that’s at least several grand.
| DIY | Professional | |
|---|---|---|
| Water | $100 - $500 | $500 - $1,000+ |
| Electric | $100-$500 | $750 - $1,500+ |
| Sewer | FREE - $500 | $1,500 - $4,000+ |
| Parking Pad | $500 | $1,000 - $5,000+ |
Tools – Cost
All hookups require special tools to install. You’ll need a wide assortment of hand tools and power tools: pipe cutters, linesman’s pliers, multimeter, etc. If you’ve worked with residential electricity and DWV plumbing before, you should already own most of these tools.
As part of building a parking pad or RV carport, you may need to trim branches and cut down trees. This may require a ladder, hedge trimmer, and other landscaping tools.
If you don’t own tools, you can A) purchase them or B) rent them. Most home improvement stores have loan-a-tool programs, especially for larger power tools.
If you’re setting up an RV hookup in your backyard, you’ll probably need to rent a trencher. Don’t cheap out with a shovel. You can accomplish a digging job in 1/100th of the time with a trencher! You can rent these tools for a half-day or more.
Labor – Cost
Installing permanent RV hookups means earthwork: digging, trenching, backfilling, etc. You’ll either need to rent heavy machinery (like a backhoe) or plunge ahead with a shovel (not recommended!).
If you aren’t pouring a parking pad, you can probably do without the heavy machinery. But laying water lines, wires and conduit means trenching, at a minimum.
Even if you plan to hire a plumber and electrician to do the work, you can save yourself some money by digging the trenches yourself. Just ask your contractor for directions.
Call a utility company before you dig! You don’t want to hit a water main or other utility. Also, make sure you’re not in danger of hitting your lawn sprinkler system, sewer cleanout, or other buried items.
Do You Need a Permit to Install RV Hookups?
Rules for RV hookups, parking and storage vary by municipality and neighborhood.
Simply plugging in your RV with an extension cord and connecting a drinking water hose to an outdoor spigot (the poor man’s RV hookup) usually doesn’t require any type of permit or permission.
In most areas, repairing or replacing existing plumbing and wiring equipment does not require a permit. However, adding equipment does! Which means you’ll probably need a building permit. These cost anywhere from $0-$500 ($100 is pretty common) and can take weeks or months to finish the application process.
This isn’t a question the Internet can answer for you. You need to contact your city officials and ask ahead of time.
Fair warning: Most zoning codes prohibit dwelling in an RV full-time or even using an RV as a guest house! Avoid using such language on any building permit applications.
The Poor Man’s Hookups
If you’re after the absolute cheapest way to hook up an RV in your backyard (without digging or trenching), you can try out the poor man’s RV hookups.
- Route an extension cord from a GFI-protected 20-amp exterior outlet to your power inlet. Use 20A-to-30A/50A (depending on your RV) adapter to connect to power.
- Run a freshwater hose (or garden hose, if you don’t mind drinking little bits of cancer) from your house spigot to your city water inlet. Or just occasionally fill up your onboard freshwater tank!
- Dump your wastewater into a portable blue boy tank. When the blue boy is full, throw it in the bed of the pickup truck (carefully!) and dump it at the nearest dump station.
Obviously, the poor man’s hookups have a lot of problems.
- Your water will freeze in cold weather.
- 20A power often isn’t enough to turn on air conditioners.
- Most plastic hoses will leach nasty chemicals into your freshwater when they sit in the hot sun.
- You can’t run an air conditioner and a microwave at the same time.
- Dumping a portable blue boy tank is time-consuming and gross.
The poor man’s hookups will work in a pinch. If you need temporary accommodations for a traveling friend, for instance, these quick n’ dirty hookups will get you by.
Truth is, if you don’t need to run your air conditioners, you can probably get away with a heavy-duty extension cord to a 20A household outlet.
A word on the extension cord: Don’t plug two or three regular extension cords together! You want to use the shortest possible extension cord with the largest available wire size. This will minimize voltage drop. Too much voltage drop, and you’ll cause a “brownout,” which can damage electrical components in your RV. We recommend a 12-gauge 50-ft cord or a 10-gauge 100-ft cord.

1. Water Hookup
For a permanent RV hookup, you’ll need to bury a water line. This line needs to be 12” below the frost depth to keep from freezing. In most the United States, that’s between 2-6 feet!
When connecting to a water source, you can technically connect at almost any point besides between the curb/meter and your main shut-off. Otherwise, your home’s main shut-off valve won’t be able to turn off the water!
Depending on your home design, your cold water system may be a conventional truck n’ branch or a modern homerun system. PEX is the standard distributing tubing for modern construction, but copper was the standard for many years. If possible, you should install a shut-off valve where you connect to the water supply.
You can connect to an underground water line or an exposed water line in your basement, next to a sink, behind a washer, etc. Be aware, though, that splicing into an existing appliance supply branch can lower the water pressure at that appliance. You can use PEX or CPVC pipe for laying the underground pipe.
Where your pipe comes up to the post, it should be UV-protected (if PEX) and strapped to the post. Wrap the pipe in outdoor pipe insulation and heat tape so it doesn’t freeze during the winter. Finish it off with a cold water hose bib.
2. Electrical Hookup
The two big cost factors when installing an RV electrical hookup are:
- 30A vs. 50A power service
- Location of the power outlet
We really recommend installing a 50A power pedestal if possible. There’s no harm in going bigger, and you can’t easily upsize in the future.
If you mount your RV power outlet to the exterior of your house or garage, you can save yourself a lot of time of money. Otherwise, you’ll need to install a power pole (with concrete footing) and bury the line.
As you can imagine, there’s a lot that goes into properly wiring a power pedestal. We can’t get into everything here. Here are some of the most important notes:
- Use UF-B wire rated for direct burial, or else fish the wire through conduit.
- For 50A, use UF-B 4-conductor 6A wire. For 30A, use at UF-B 3-conductor 10GA wire. For longer distances, a larger gauge wire may be required to prevent voltage drop.
- Use a weatherproof box mounted on a pressure-treated 4×4 post. Dig a post hole 30 inches deep and 8 inches wide; set the post in a Quickcrete concrete footing. If you don’t use concrete, at least mix dirt with crushed rock to give it some stability.
- If you’re installing a 30A outlet, make sure you use a NEMA TT-30 receptacle, which is wired for 120V! These are commonly confused with 240V 30A receptacles used for dryer outlets – not the same thing!
- Purchase a power pedestal with a circuit breaker subpanel. Don’t just install a temporary outlet box; you need to be able to shut off power at the pedestal for safety reasons.
- Always use an EMS surge protector when plugging in!
3. Sewer Hookup

Don’t Dump On the Ground!
Don’t listen to the nonsense that it’s safe and OK to let your gray water run on the ground! Gray water stinks. It can stink just as bad as black water. You don’t want that in your yard.
Plus, many of the shampoos and soaps we use when cleaning and bathing can harm plants, contaminate groundwater, and otherwise screw up the ecosystem.
If you’re only using your backyard RV hookups occasionally, then maybe you can get away with dumping your gray water straight on the ground. For regular, seasonal or full-time use, though, you’ll need to connect to a sewer system.
Connect to a Sewer Clean Out
If your home is connected to a municipal sewer system, you most likely have a 4” (very rarely 3”) sewer cleanout port in front of your house. This cleanout is just a vertical pipe that tees into the main sewer drain. If your local code allows, you can just connect your RV sewer hose directly to the sewer cleanout!
If your home is connected to a septic system, you can do something similar. This time, the sewer cleanout is likely in your backyard. Again, confirm with local officials whether temporarily connecting to your home’s septic system is up to code.
If the sewer cleanout is far away (or uphill) from your RV, you will need a long, durable RV sewer hose and a macerator pump.
If your sewer system doesn’t have an accessible cleanout, you can sometimes add one (with a permit). If your home has a septic system, for instance, you may be able to add a 4” cleanout port either directly into your tank or into the main drain pipe. This may be necessary if your cleanout is located inside your home, such as in a bathroom or closet, or in your crawl space.
However, many localities will not allow you to dump directly through a sewer cleanout port. You can face severe fines for violating this code!
Install an In-Ground Septic Tank
In some areas, you may be required to install a separate in-ground sewage tank for your RV hookup. This is costly. And impossible for anyone but a super-DIYer.
Alternative Sewer Solutions
If you cannot easily hook up to your existing sewer system, and you don’t want to spend the money on a separate system, there are several alternatives.
- Composting toilet: These toilets cost from $250 to $1,000. Best for occasional use, composting toilets leverage heat, air and microbes to transform human waste into safe, non-stinky compost.
- Incineration toilet: While expensive (around $2,000), incineration toilets safely burn human waste into ash and non-toxic gases.
- Porta-Potty: Yeah, they’re kinda gross, but they work well in an emergency. And they’re cheap.
- Portable tank: You can always dump your waste into a portable tank for later disposal at an approved dumpsite. See the poor man’s RV hookup section for more information.
4. RV Parking Pad
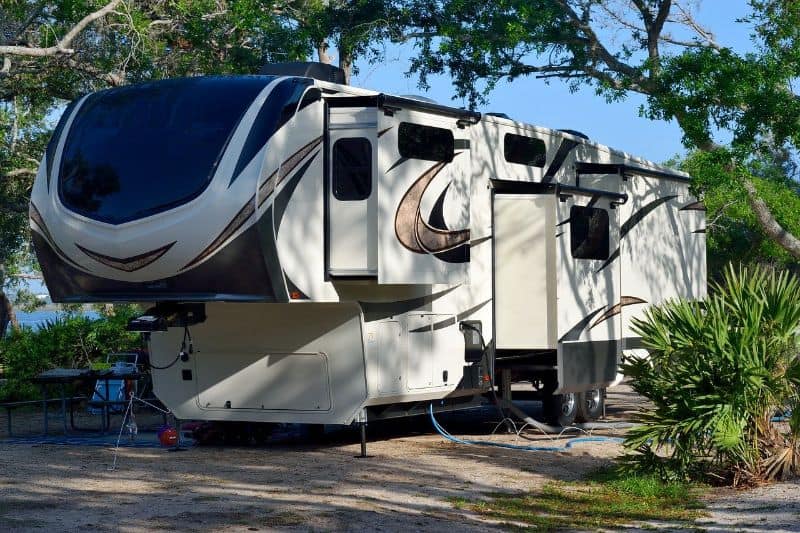
You should build your parking pad as large as you can make it. There’s no such thing as a too-big parking pad. What if you upsize in a few years? What if you sell the house to another RV owner, who owns a Big Rig 40-ft Class A coach?
At a minimum, your pad should be four (4) feet wider and longer than your RV size. (Measure the length as tip-to-tail, not just body length).
You have several options for how to build your parking pad. Options include:
- Gravel
- Concrete
- Pavers
- Tamped earth
A full description of how to pour a concrete pad or build a permeable paver parking pad is beyond the scope of this post. But, we do want to offer some helpful tips.
DIY RV Parking Pad – Helpful Tips
- You’ll need to clear, grade (level), and tamp the parking spot. Ensure proper drainage. You don’t want to funnel water towards, say, your home’s foundation! You’ll probably need to hire professional help for this step. You can’t just rent a backhoe and start moving earth. YouTube will not confer magical craftsman powers upon you.
- Don’t forget the edging. Adding a wooden, stone or concrete edging will massively improve the curb appeal of your parking spot. Plus, it prevents erosion and controls water flow.
- If using gravel, use #2 washed gravel or #57 crushed stone (limestone). Put down 4-6 inches of gravel (6 inches for heavier motorhomes). Don’t use recycled concrete, which might have stray rebar in it. Use a gravel grid reinforcement system and landscape filter fabric to prevent gravel from sinking or spreading out.
- If pouring a concrete pad, don’t forget (or forego) the good stuff! Choose at least 4000# psi concrete mix with plenty of rebar reinforcement and expansion joints. Space the expansion joints no more than 2 times (in feet) the slab thickness (in inches). So a 4” pad, for instance, should have expansion joints every 8 ft (or less).
- Check the code. Your locality may have strict rules for backyard parking pads, including A) whether they are allowed to exist and B) how they must be constructed.
Installing RV hookups at home can sound like a daunting task. And it’s different for everyone. If you’re parking your RV side-by-side with your house, you might be able to finish the project in a weekend! If you’re building a remote camping spot 200 feet from your residence with a separate septic system, it may take months to contract and finish the work. But as the saying goes, “The best time to get started is yesterday!”
Andy Herrick is a blogging nerd, #8 Enneagram, wannabe bread baker, INTJ, RV industry professional, and small business entrepreneur. He can be found hanging out with his lovely wife and family, skiing, cycling, climbing, hiking, and convincing anyone who will listen why dogs aren’t really that great of pets. Also, he runs this website.