Buying your first RV is exciting. Picking up the RV from the dealer is even better. Everyone wants to get the keys and drive off. The thinking is, no worries, I’ll read the manual and be good to go, right? Nope, not a good idea.
Why does the dealer insist on an RV walk-through? Recreational vehicles are complex, with multiple systems integrated to become your home on wheels. Familiarizing yourself with your new purchase before you drive off will help you understand how everything works, including appliances, vehicle handling, safety while driving, and how to use all the conveniences to enjoy your new RV experience.
The All-Important Dealership RV Walk-Through
The dealer will typically schedule a walk-through with you within a few days of purchase. If you negotiated with the dealer to add items to your RV before pickup, the walk-through will be scheduled when those items are completed. For example, we negotiated additional paint protection and a bug guard to be added to our rig.
Plan for 1-2 hours for an excellent, thorough walk-through.
If you are like me, I cannot for the life of me remember every word someone says to me. I also cannot write fast enough to document every word. What did I do? I took my cell phone and recorded multiple videos of our walk-through. Each system, per the manufacturer’s manual, was a different video.
I reviewed the manufacturer’s specifications the night before to prepare for the walk-through. I looked at the manual online. I noted how the manufacturer broke down the different systems for the RV in their manual. I used that as the basis for asking the technician to guide us through the walkthrough. In our case, I created eight different videos.
Questions to Ask The Dealership During Your Walk-Through
Since the electrical system is relatively large, I asked the technician to break it down a bit. One video was for when we were connected to an electrical system. The second video was for when we were boondocking or dry camping. Yep, there are differences.
As many of us know, RVs are not necessarily the highest quality materials but the lightest weight. We found a few issues at the dealership during our walk-through. Hardware that was missing from the bedroom cabinets. Oops, whoever installed the closets must have been in a rush.
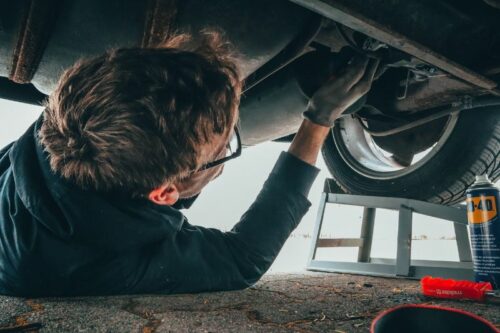
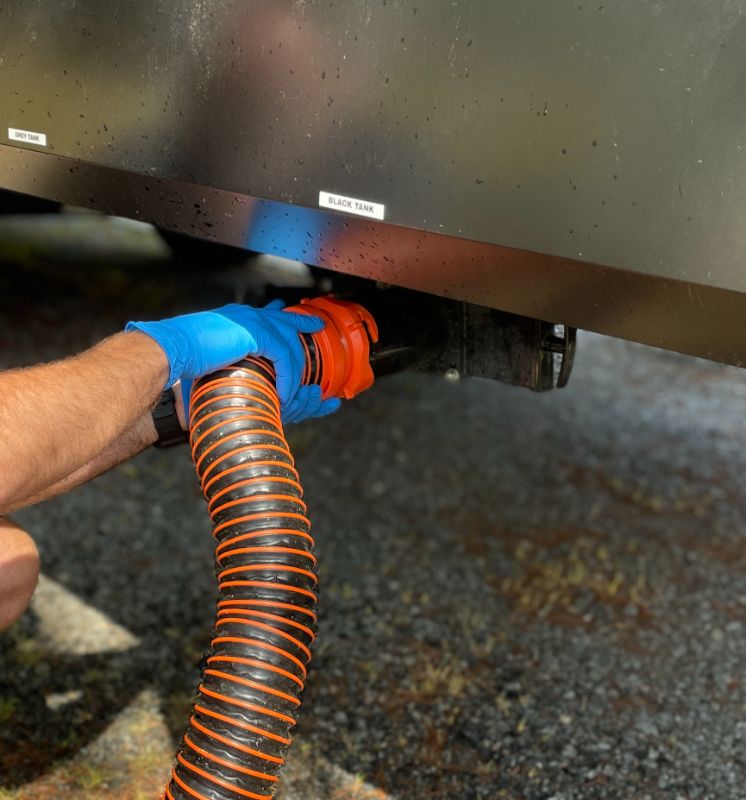
I asked the dealer to connect the RV to their water system. Although they typically point out how to do this during the walk-through, they do not normally connect a hose and assess the system with you. I made them connect the hose while we were there. What did we find? There was a water leak.
It was a quick fix, but the technician had to open the panel where the hose from the water source goes into the RV and connect a disconnected water line. I recorded the whole thing, so the walk-through was documented. Side benefit: I also learned what was behind the panel where the city water connection and several other connections are located.
After a little over two hours, we were off with our brand-new RV. We were super excited to start our new adventure.
Areas to look at during the Walk-Through:
- Plan how to document the walk-through (video, paper).
- Break up the walk-through by key area (driving, appliances, water systems, etc.)
- Plan for looking at the roof, under the rig, and engine (dress appropriately.)
- Ask the dealer to add water while you are present.
- Flush the toilets and run the sinks to look for leaks.
- Open and close all cabinets.
- Open and close all exterior cubbies.
- Start the generator.
- Hook up to power at the dealership.
- Look at and check the house batteries.
- Turn on all lights, electronics, etc., to ensure they function correctly.
Our Exciting First Trip – and Return to the Dealership :'(
We had decided to sell our older RV and purchase a brand-new one. We were going to move into our RV full-time. So, we decided to upgrade and get an RV with a few more conveniences than our old RV. I had previously owned several trailers, toy haulers, and RVs; each time, I found issues on my first trip out. Hence, we planned a quick first trip to see what we could find.
Our first trip out was a weekend away at an RV park about 30 minutes from our house. We wanted to experience the RV and see if there were any surprises or items we needed addressed by the dealer.
Our location was beautiful. We went to the RV park where we would move to in about 12 weeks. We wanted to check out different areas of the park and our new home on wheels.
While driving the RV, I immediately noticed that the steering wheel was not aligned correctly. I had to hold the wheel approximately 15-20 degrees left to go straight down the road. Is that really a big deal?
It may not be a big deal if it’s not a windy day and I drive down a 4-lane highway. Over time, it became a big deal as we went on a few longer trips. It became more stressful in the wind to turn the wheel 15-20 degrees left to go straight and adjust for the wind coming from the side.
More on the steering resolution in another post. I can tell you that the dealer said it was not something they would address. That was a manufacturer issue; I could go directly to the manufacturer if I wanted. By the way, most RVs are manufactured in the Midwest or the South; I was in California.
A Toilet That Wasn’t Even Connected to the Tank!
Since we had an RV previously, we were not overwhelmed with the functions of the new RV. We used two people to get back into the RV spot without damage. I have seen many people think they were great drivers and not have a second pair of eyes when backing up.
Yes, our RV has a backup camera. However, that backup camera cannot see tree limbs or other obstacles not in the camera’s line of sight. To save myself from an embarrassing situation, I drove slowly, and my spouse guided me into the spot from outside. I just turned up the volume on the backup camera so I could hear any instructions.
Overall, the first camping trip was mostly successful. We noted some other items that did not work on the RV. I was not surprised. Every RV I have ever owned had issues found on the first trip out. That is true for both used and new RVs and trailers that I have owned.
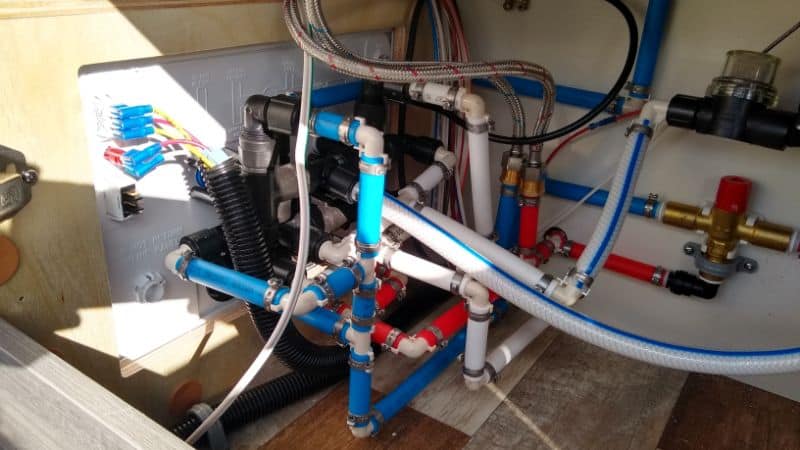
We made a list of the issues. Everything from cubby locks not working to the toilet not being connected to the black tank. Wow, that was a surprise—a very embarrassing surprise at that.
How did we discover the toilet to black tank issue? Didn’t we do a thorough walk-through at the dealership? Well, I thought I had planned a detailed walk-through. In hindsight, I did not ask the dealer to lower the stabilizing jacks after flushing the toilet.
We were ready to pack up and head home at the end of our wonderful weekend in our brand-new RV at a lovely beachside in San Diego. We had a few warranty items documented as broken and needing repairs, but nothing that seemed overwhelming.
I have heard stories about RV drivers taking off without putting up their stabilizing jacks. We have always diligently checked that the jacks are truly up before driving. Yes, an indicator light turns off if the jacks are up. In an overabundance of caution, we always check that the stabilizer jacks are also up visually.
We got everything secured inside, slide-outs in, and the awning retracted. Everything was put away inside. Outside, we made sure all cubbies were locked. We were disconnected from electrical, water, and cable. All looked great. I went back inside and started the engine. The engine must be running on our rig to retract the jacks. I pushed the magic retract button to bring up the jacks.
Everything was going well. Then suddenly, a big gush of water appeared…. and it kept on coming. I thought maybe the neighbors on the other side were rinsing something off. We looked around our rig, and holy moly; water was coming from our rig!
The more the water ran, the more I realized it was not plain water but black water (sewage system). First, I clearly did not empty the black water tank before packing up; rookie mistake. Second, why was the tank draining onto the ground?
We had to call the rangers at the campground to let them know we had a black water leak. The rangers graciously cleaned up the mess, but we were absolutely embarrassed. The next call was to the dealer.
The dealer found that the connection from the toilet to the black water tank was not correctly installed. The pipe had dislodged when we retracted the jacks. If I had fully emptied the black tank before driving off, we would not have sprung a leak, and we also would not have known about this issue. The dealer replaced the damaged black tank and fully connected the toilet plumbing to the tank. We also disinfected the affected cubbies. We tested the toilet plumbing the second time we picked up our RV from the dealer.
The story’s moral is to do a thorough walk-through at pick-up time. Even after the walk-through, take a short trip out the first time to find any potential issues. Without fail, every time I have owned a new or used RV or trailer, I have discovered issues on the first trip. Be patient and realize the dealer may need some time for warranty repairs depending on the issue.
Functions to Verify Before Leaving Your First Campsite:
Prep the inside for the drive home first
- Wipe down counters.
- Sweep the floor (reduces scratch marks from slide-outs).
- Put the toilet lid down.
- Take out the trash.
- Lock the refrigerator doors so they cannot open while driving.
- Turn off the water heater.
- Turn off propane.
- Ensure the shower head and shower door are secured.
- Verify any loose objects are secured.
Prep the outside for the drive home
- Dump black tank.
- Dump the grey tank second (this helps flush the hose.)
- Disconnect the water hose.
- Disconnect power (if connected).
- Disconnect cable (if connected).
- Pull in awning.
- Pull in slide-outs.
- Pull up the jacks.
- Walk around the rig and verify everything is disconnected, pulled in, and the jacks are up.

I currently reside in the Tucson, AZ, area. Having two dogs, one is a Great Dane puppy, keeps us very entertained and busy. We love to camp and explore. We enjoy riding in the desert in our Razr and hiking in our local mountains. Our RV is the dogs' home they choose to share with us so we can take them places, and we love it!