Anyone driving a larger A-Class Motorhome knows it feels like driving a square toaster box. It is not bad on flat, straight roads with no wind. However, a side wind, twisty road, or other exciting conditions can make driving a Class A Motorhome very interesting. On turns or when a strong wind comes, you can feel the roll of the Motorhome box (side-to-side motion). When you go over bumpy roads or rolling hills, you can feel the tail wag or “dolphin motion,” as I call it.
How that roll and dolphin motion are controlled can be changed. If you are handy, some very straightforward changes can be made to the chassis to make driving your Class-A Motorhome less stressful on your mind and body. I did a lot of research and asked many questions before deciding what to do for our rig.
The total investment was approximately 4 hours of my time and less than $2,000. I also looked at upgrading the leaf springs and upgrading the shocks. I decided not to make those changes yet. I chose to make the changes I could easily make on my own first and then see if driving control and fatigue were improved.
I Made the Cheap Handling Fix On My Ford F53 Chassis
Editor’s Note: The procedure described below is infamously known as the “Cheap Handling Fix.” It’s not sanctioned by Ford, and many manufacturers adamantly recommend against it. You are likely to over-stress the sway bar end links and shear them off completely, rendering the sway bar completely useless. Proceed at your own risk!
Know your rig! The most popular A-Class chassis are Ford, Chevy, or Freightliner chassis. To update anything on the chassis, you need to know which chassis you have along with your rig’s GVWR (gross vehicle weight rating). You can find that information on the vehicle tag inside your rig, typically near the driver’s area.
Now that you have that information, you can look at some very straightforward fixes that you can do at home to control roll and dolphin motion. My rig is a Fleetwood Bounder 35-foot Class A Motorhome with a gas engine. My Bounder is built on the Ford F53 chassis. All the changes I discuss in this article are regarding the F53 chassis.
The first change I made was to change the control arm position on the sway bar from the stock position (outer hole) to the inner position (inner hole) on both the front and rear sway bars. It took approximately 30 minutes to change the front and rear control arms to the sway bar from stock to a new position.
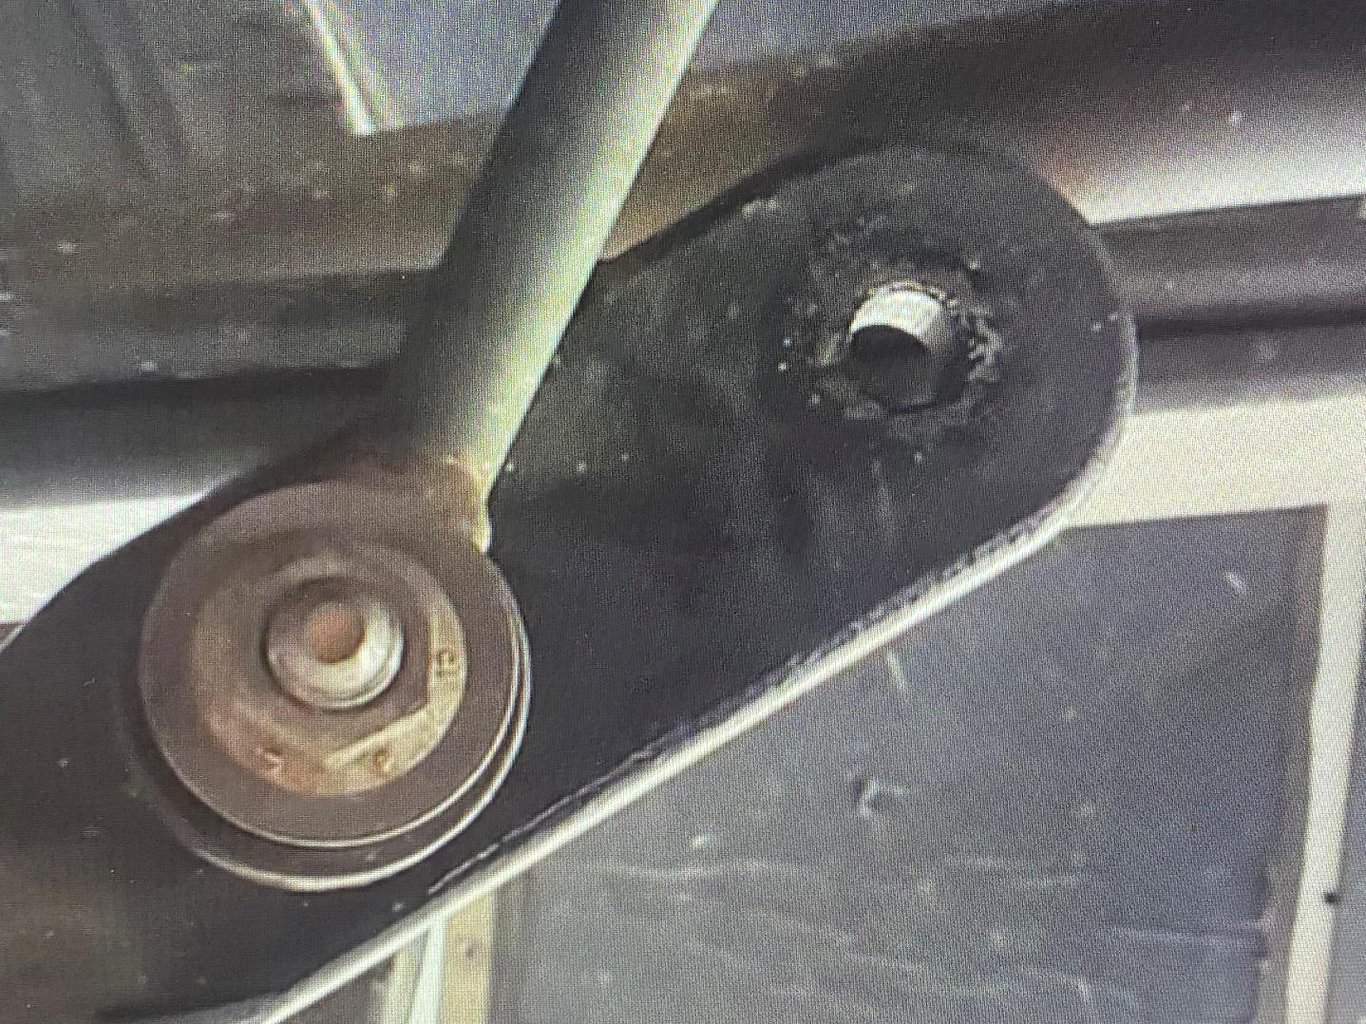
This will help control the sway or roll you feel when turning or driving crosswinds. This dramatically reduces the fatigue you can experience when driving long distances. You can see the final change in the pictures below.
I took the rig out for a test drive when I completed the change. Wow! I noticed an immediate difference. When I first entered the motorhome, it used to rock slightly when stepping on the steps without the levelers down. That slight rocking was gone.
>>> READ MORE: How Fast Can I Drive or Tow My RV?
While there was still some roll when turning, this simple sway bar to control arm change helped. I did have to figure out the torque specifications. Google was not the best for all the torque specifications. I discovered that Ford has a Motorhome Assistance Center you can call to get torque specifications for the chassis. Ford Motorhome Assistance Center: 800-444-3311.
I Installed the SuperSteer Safe-T-Plus Steering Control
The second change I made was installing the SuperSteer® Safe-T-Plus steering control unit. Installing this unit took approximately 1.5 hours once I had all the correct tools and knowledge regarding torque specifications.
There is some recommended pre-work that should be done before installing the unit. I, of course, did not listen at first. I could not get the correct alignment after the installation the first time because I did not follow the SuperSteer® recommendations.
You can take your A-Class Motorhome directly to the SuperSteer factory if you live near Tallapoosa, GA. The factory will install and correctly align the unit for you.
What I failed to do first is to get your front wheel alignment checked, even if your rig is brand new. I know what you think: my rig should have the front wheels properly aligned. Often, the alignment is not true when you purchase your rig. While getting the wheels aligned, you can also get the steering wheel aligned correctly.
Now, the steering will be at 12 o’clock when you drive instead of turning the wheel 5°-10° degrees left or right of true center to go straight down the road. Once you have your alignment and steering wheel true, you can move on with chassis changes by going to the SuperSteer website and ordering the Safe-T-Plus yourself. I ordered from Amazon.
The following is a list of the items I ordered and installed on my 35-foot Fleetwood Bounder:
- SuperSteer®Safe-T-Plus Steering Control 41-180 (White) ($580)
- Safe-T-Plus Mounting Bracket Kit for Ford F53 F-105K2.5 ($83)
- SuperSteer® SS401 Rear Trac Bar for Ford F53 V10 ($610)
I will provide a complete list of tools used for all the chassis upgrades at the end of the article.
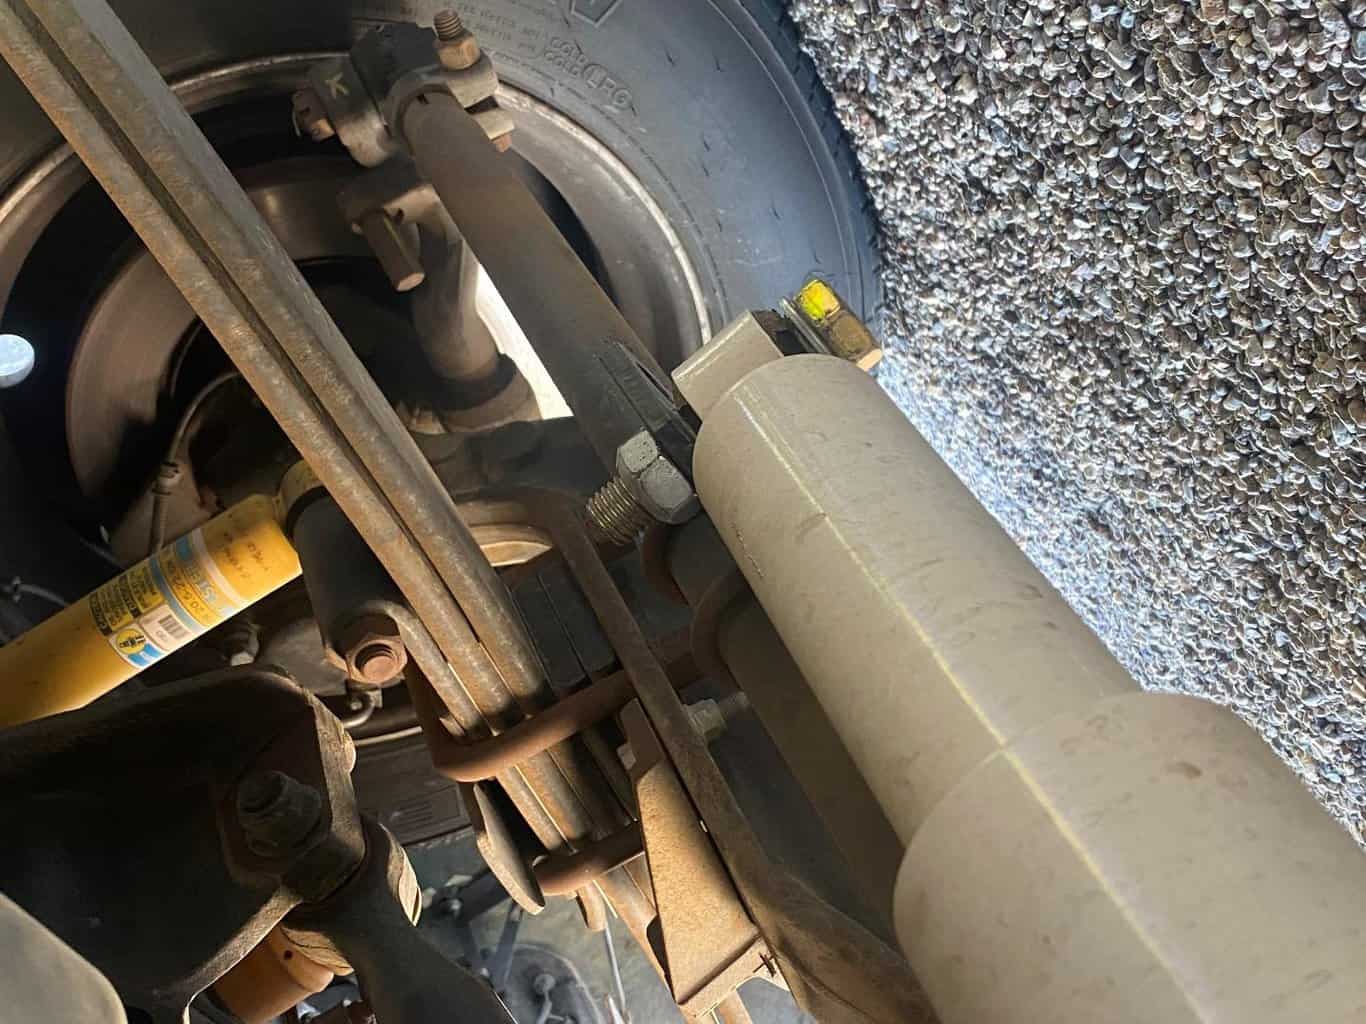
The Safe-T-Plus installation is very straightforward. It is a bolt-on installation, requiring no drilling or chassis modifications. As you can see in the final picture below, the unit is installed over the tie rods using brackets and U-bolts.
Installing the Safe-T-Plus unit is to help your Motorhome track straight down the road true to center and not get the wheel pulled around by road conditions (rough roads, ruts in the road, strong winds, etc.) Of note, access is easier if the Motorhome is up on blocks. I drove up on large wooden blocks to gain additional clearance.
After getting the front wheels aligned and the steering wheel centered correctly, it was very straightforward to get the Safe-T-Plus installation correct. I took my motorhome to the local truck tire shop in my area. A regular tire shop may or may not be able to work on your motorhome. Big Rig shops will typically do front-end alignments and tire replacements for motorhomes.
Driving the Motorhome for my test drive was like night and day. This was a whole new Motorhome. I live in an area with very rough roads. I was no longer hanging on and muscling the motorhome while driving down the road. I was able to steer the Motorhome with one hand easily. The drive was very relaxing.
I noticed that I was still experiencing some of the rear tail wagging or dolphin effects from passing trucks and crosswinds. This would cause me to slow down to ensure I felt in control of the Motorhome. I researched and decided to install the SuperSteer® SS401 Rear Trac Bar ($610) for my Motorhome. The idea was to reduce that rear tail wag while driving.
>>> READ MORE: 30 Facts We Wish Everyone Knew About RV Towing
I Installed the SuperSteer SS401 Rear Trac Bar
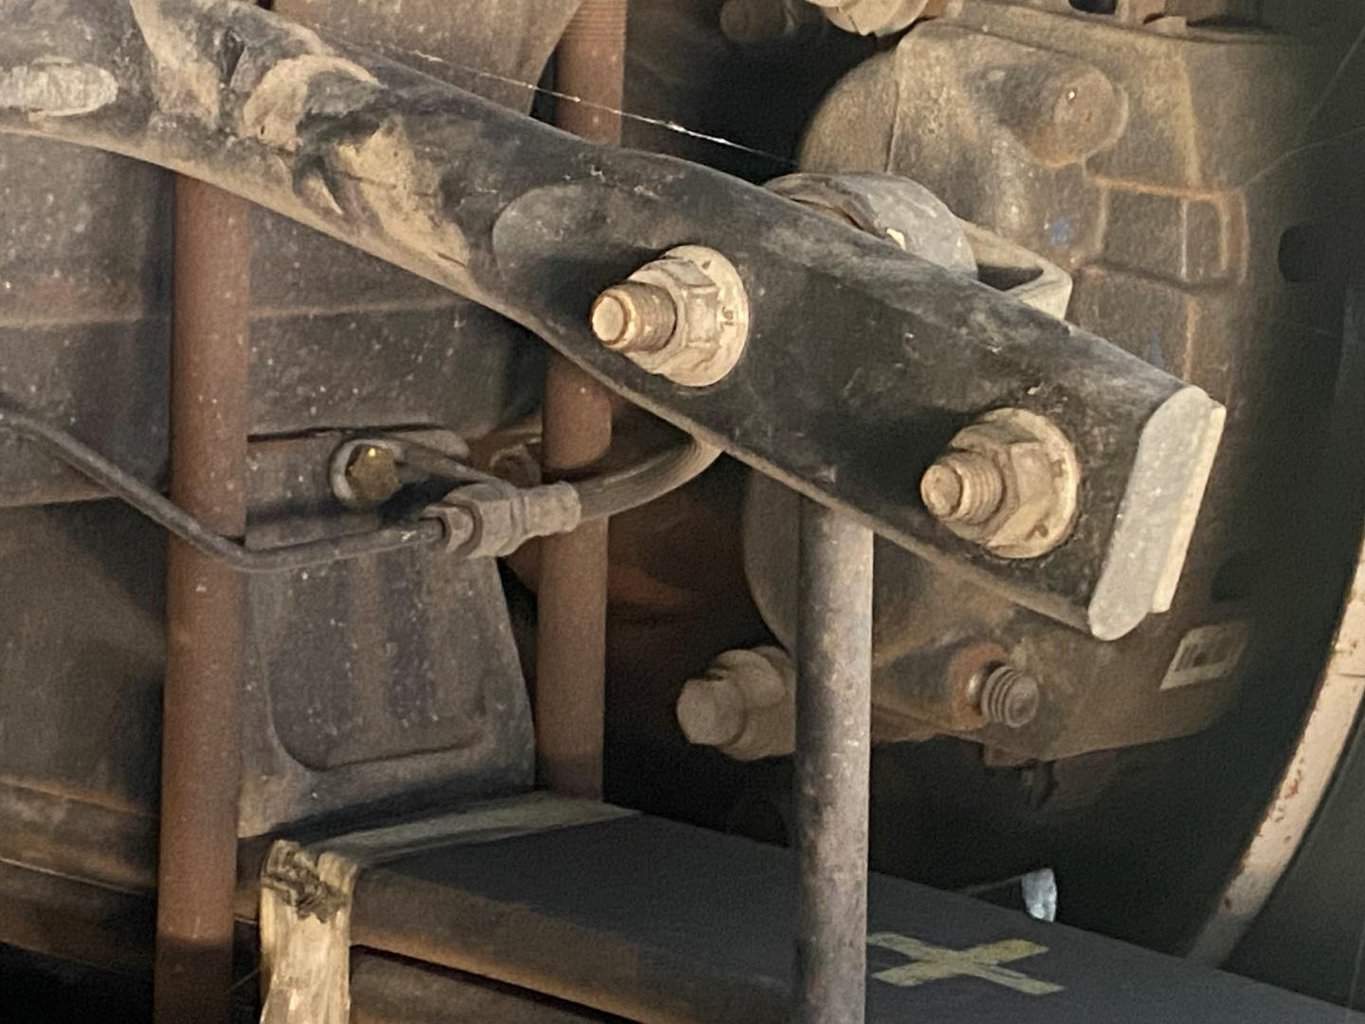
The third and final handling upgrade I did took approximately 2 hours. A couple of bolts were difficult to remove; welcome PB Blaster. I soaked those hard-to-remove bolts in PB Blaster for about five minutes and removed the less cooperative bolts. One of the threads had to be tapped due to a cross-threaded bolt installed at the factory.
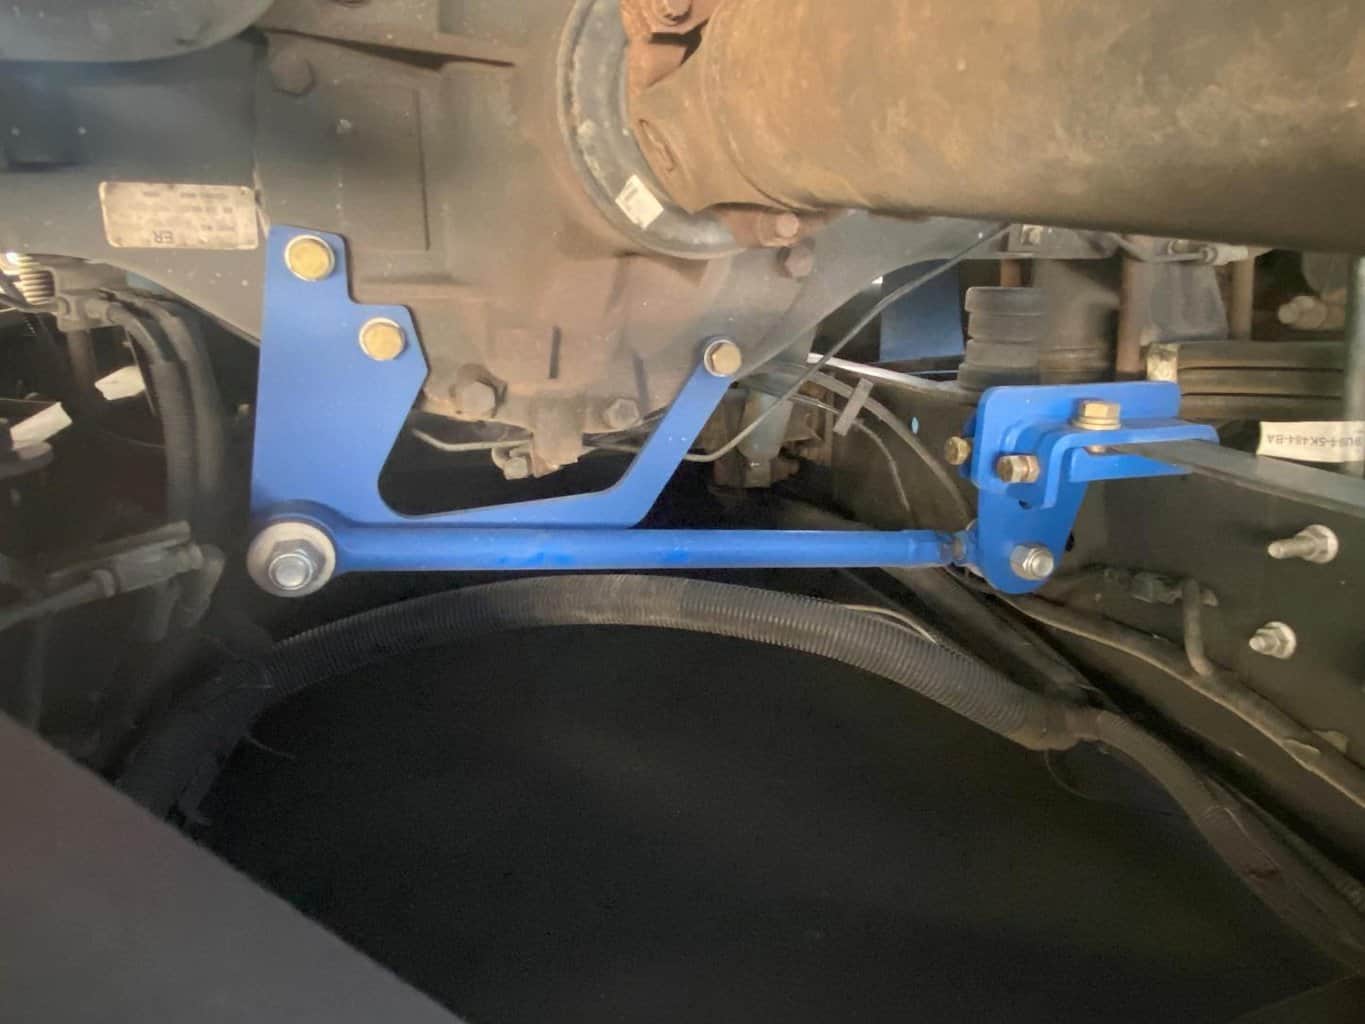
As you can see from the photo below, you do have to remove three bolts from the rear differential to complete the installation. Again, no drilling is required. This is a bolt-on installation. You will need to determine if your motorhome has metric or standard holes. Both bolts are provided in the kit, along with two different mounting kits.
I did one final test drive after installing the Rear Trac Bar. WOW! This was a completely different Motorhome driving experience. When trucks went flying by, I did not feel any tail wag. The side winds were hardly noticeable at all. Success!
For less than $2,000 (including wheel alignment), I enjoyed taking the motorhome on longer drives. I found that I could drive further without feeling exhausted at the end of the drive. I highly recommend some relatively minor changes to enhance your RV driving experience.
Since I did not own impact tools, I purchased some impact sockets, a torque wrench, and an impact adapter and reducer set from Amazon. Below is a list of the additional items I purchased, along with the costs of what I paid in 2022:
- 1/2” Metric Socket Impact Set, 10-24mm ($45)
- ½” Drive Torque Wrench 10-150 ft/lb. ($37)
- 1/2” Drive Deep Impact Socket Standard Set 3/8” to 1-1/4” ($42)
- SAE Open End Wrench Set 1” to 1-1/4” ($39)
- Impact Adapter and Reducer Set ($8)
- Red Thread locker ($7)
- DeWalt Atomic 3/8” Impact Wrench ($129)
- PB Blaster ($6)

I currently reside in the Tucson, AZ, area. Having two dogs, one is a Great Dane puppy, keeps us very entertained and busy. We love to camp and explore. We enjoy riding in the desert in our Razr and hiking in our local mountains. Our RV is the dogs' home they choose to share with us so we can take them places, and we love it!